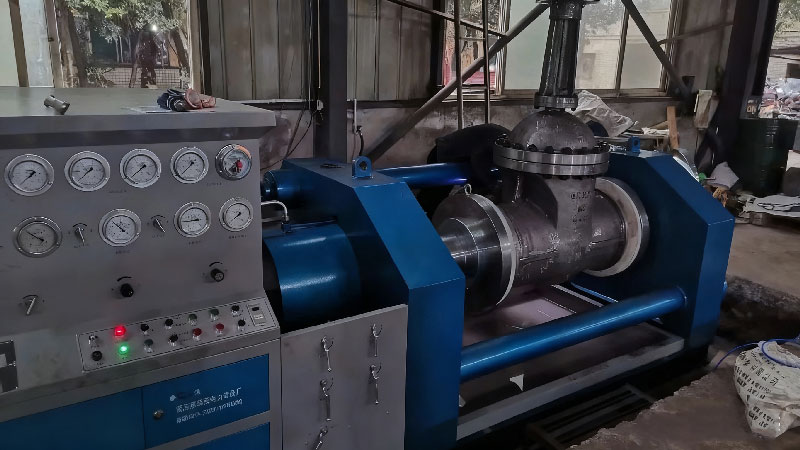
In any fluid transport system—whether in industrial plants or municipal networks—valves play a vital role in controlling flow, isolating lines, and ensuring operational safety. Among various valve testing methods, the hydrostatic tightness test is one of the most critical steps for assessing sealing performance and structural strength.
This article provides a complete guide to valve hydrostatic testing, including its purpose, test procedures, international standards, and practical importance for valve quality control.
Table of Contents
Toggle1. What Is a Valve Hydrostatic Test?
A hydrostatic test is a pressure test performed on valves using water as the test medium. The valve is subjected to a specified pressure—typically higher than its rated working pressure—to check for any leakage or deformation.
It simulates real operating conditions and helps determine whether the valve body and sealing surfaces can maintain zero leakage under pressure.
Purpose of the Test
Ensure safety: Prevent leakage of hazardous media such as gas, chemicals, or oil.
Verify sealing performance: Confirm that valve seats, stems, and bodies provide tight closure.
Validate product quality: Ensure compliance with manufacturing standards before delivery.
2. Preparation Before the Hydrostatic Test
Proper preparation ensures accurate and reliable test results.
(1) Visual Inspection
Check for casting defects, cracks, or surface damage.
Verify that the valve type, pressure class, and material match test requirements.
(2) Cleaning
Remove dirt, rust, grease, or debris from the valve interior.
Ensure all passages are clear and sealing surfaces are clean.
(3) Test Equipment Setup
Pressure Pump: Must provide stable output pressure (manual or electric type).
Pressure Gauge: Range 1.5–2× test pressure; accuracy ≥ 1.6 class.
Connections: Secure all flanges and fittings to avoid leakage during testing.
(4) Environmental Conditions
Maintain ambient temperature above 5°C (ideal 20°C).
Ensure proper drainage and safety barriers around the testing area.
3. Test Pressure and Duration
Hydrostatic tests include two major stages:
| Test Type | Test Pressure | Purpose |
|---|---|---|
| Shell Test | 1.5 × Nominal Pressure (PN) | Checks body strength and integrity |
| Seat Tightness Test | 1.1 × PN | Checks sealing performance |
Duration:
Hold the pressure for 5–15 minutes, depending on valve size and specification.
4. Step-by-Step Hydrostatic Test Procedure
Step 1: Filling and Air Removal
Slowly fill the valve with water to prevent shock.
Open vent valves to remove trapped air until water flows steadily.
Step 2: Gradual Pressure Increase
Increase pressure in stages (30%, 80%, 100%).
Observe for early leaks or deformation between each stage.
Step 3: Pressure Holding
Maintain full pressure for the required duration.
Observe the valve’s body, joints, bonnet, stem packing, and seat for leakage.
Step 4: Pressure Release and Drying
Slowly release pressure to prevent sudden impact.
Drain water and dry internal components to prevent corrosion.
5. Valve Testing Standards
Valve hydrostatic tests are governed by international and national standards that define testing procedures, pressure levels, and acceptance criteria.
International Standards
ISO 5208:2015 — Pressure Testing of Metallic Valves
Defines procedures and leakage classes for industrial valves.API 598 — Valve Inspection and Testing
Issued by the American Petroleum Institute; covers steel, iron, and alloy valves.
Chinese Standards
GB/T 13927-2008 — Industrial Valves – Pressure Testing
Specifies test pressure and methods for all valve types.GB/T 26480-2011 — Valve Inspection and Testing Specifications
Defines testing sequences, acceptance rules, and reporting requirements.
6. Acceptance Criteria and Common Issues
Passing Criteria
✅ No visible leakage from any part of the valve.
✅ No structural deformation, cracks, or damage.
✅ Smooth operation after testing.
Common Causes of Test Failure
Damaged sealing surfaces or gaskets.
Uneven bolt tightening during assembly.
Porosity or cracks in the valve body.
Solutions
Polish or re-machine sealing surfaces.
Replace defective seals or gaskets.
Discard valves with serious casting defects.
7. Importance of Hydrostatic Testing for Quality Control
Ensures Safety and Reliability
Prevents failures under pressure and guarantees leak-free operation.Verifies Manufacturing Quality
Detects hidden casting or machining defects before shipment.Supports Certification and Compliance
Required for CE, ISO, API, and other quality certifications.Builds Customer Trust
Demonstrates a commitment to quality and safety through transparent testing data.
8. Modern Innovations in Valve Hydrostatic Testing
Automated Test Benches:
Control pressure cycles, record data, and detect leaks via sensors or cameras.Non-Destructive Testing (NDT):
Ultrasonic or dye penetrant inspection can detect microcracks before pressure testing.Digital Data Logging:
Electronic records improve traceability and streamline QA documentation.
9. Conclusion
A valve hydrostatic tightness test is more than just a routine inspection—it is a vital step in ensuring product quality, system safety, and long-term reliability.
By following recognized standards such as API 598 and ISO 5208, and implementing automated or digital testing systems, valve manufacturers can achieve higher precision, consistency, and customer confidence.
At TOT Valve & Flow Control, we perform rigorous hydrostatic testing on every valve we manufacture, ensuring 100% compliance and zero leakage before delivery.
If you’re looking for high-performance industrial valves that meet international pressure testing standards, contact us today for technical consultation or a free quote.
